Easy Steps to Preparing PowerPoint Slides for Your Research Project
April 17 2019, By Ayedele Solomon
“Are there any easy steps to creating PowerPoint presentation for a research project?” That’s one of the major questions I answer. Everyday!
More often than not, many undergraduate and post graduate students get intimidated by it. And the truth is, you might have the insights of a professor, but without well-prepared slides, you can’t communicate effectively with your audience during your project defense, let alone convince them.
Believe me, I felt a bit like it’s rocket science too, the first couple of times I used PowerPoint; until I discovered this nice little recipe I want to share with you In 3 short minutes.
Yes. Preparing PowerPoint slides for your research project can get even easier. Regardless of what your research topic is. Even if this is your first time at it, or you’ve dared to use it a little bit.
How?
By reading the done-for-you steps in the coming lines. So let’s go over it practically and be sure you absorb it.
Step 1:
Launch Microsoft PowerPoint
First thing first. Locate PowerPoint on your computer. Click on it to open it up. If you have another version of PowerPoint, or another os, relax…, it’s just enough if you get all the basics. It could be a little bit different, nonetheless, the functionalities are very much the same.

Step 2:
Choose a Template
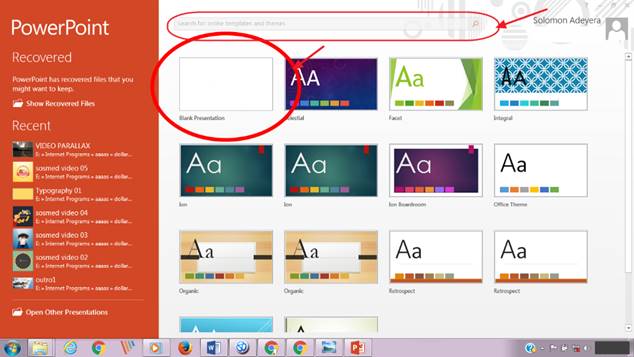
Once the program is launched, the next option is to choose from the grid of templates and styles that shows up. Browse through the design templates and make a choice.
The alternative is to go up and click, “Search for Online Template”. You can go online to choose the template that fits your research topic. Anyhow on the contrary, for the sake of this guide, I’m using blank. If that soothes you as well, join me in the next step to begin creating your PowerPoint slides with ease.
Step 3:
Slide Layout
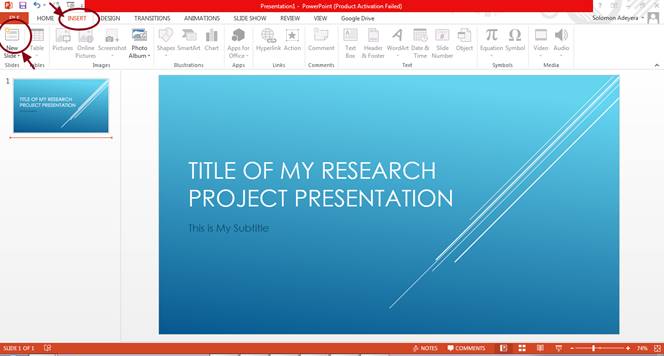
If you chose a blank template from the previous step, a blank screen with two boxes will show up right away. A blank slate to get you started with your slides. Of course, the upper box says, "Click to Add Title," while the lower one reads, "Click to Add Subtitle." This is exactly where you’ll edit your first slide.
Just in case the default layout doesn’t really flow with your content, you might need to modify your slide layout so that your information is presented in the best logical way. Navigate to the upper ribbon of the screen, and select the “Home”tab, after then, select “Slide Layout.” Pick your desired format.
See it clearly below:

Again, right on the left side of the screen, there’s a little corresponding thumbnail of the every current slide you’re working on. Think of it this way, that small rectangle on the left represents the lager one that’s showing at the middle of your screen. You get the idea? Good!
Step 4:
Input Text
You probably already know, how you input your text in PowerPoint looks similar to other text programs like Microsoft Word. It’s as easy as hovering your cursor on the box that reads, “Click to Add Title”and then type in your title of your presentation. In that same manner, you click right below to add up a subtitle.
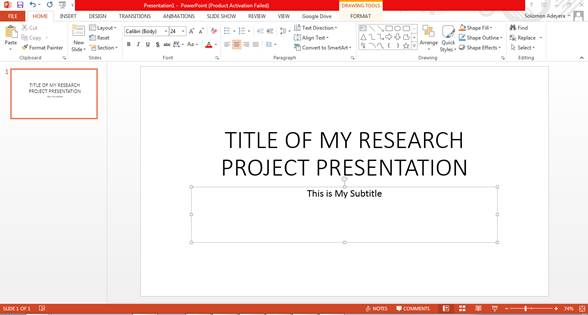
Before we take it a step further, keep this in mind, your first slide should set the scene of your presentation.
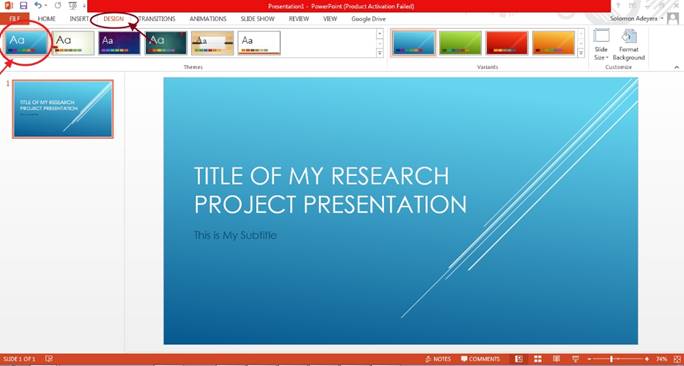
Although with this theme, your slide looks too plain. But if you love colorful design like I do, you’d head on to the “Design” tab up there, where you’ll be able to choose from a bunch of other beautiful themes.
Step 5:
Adding New Slides
At this point, you’re done with the first slide, the next point of action is to add new slides. You do this by clicking on the “New Slide” button, and then click on its upper part to add a slide.
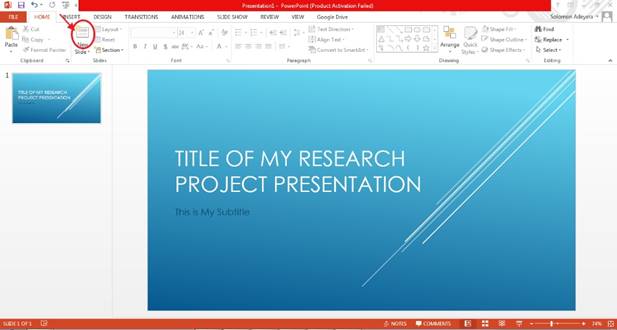
All the same, there are several other ways you can add new slides to your presentation. For example, from the “Home” tab, a single right-click on an empty space on the left colon, under the thumbnail I mentioned earlier on, pops out options where you select “Add New Slide. Another instance would be to go straight up to the “Insert” tab, choose “Add Slide” which is the first option from the top-left.
You've got to wonder, there’s a slight difference between slide one and two. Basically, slide one is setup to be the title slide of your presentation. The texts are specifically placed in different areas of the screen to show that this is special, and this is the opening slide.
Step 6:
Adding Visual Elements
Now it’s time to add some visual elements like images to your slide. They make your presentation more engaging and dramatic. Consequently, the important key to great presentation is to keep it simple as well.
So, get at it. Left-click on the “Insert” tab. It shows up a bunch of different elements you can adorn your slide with.
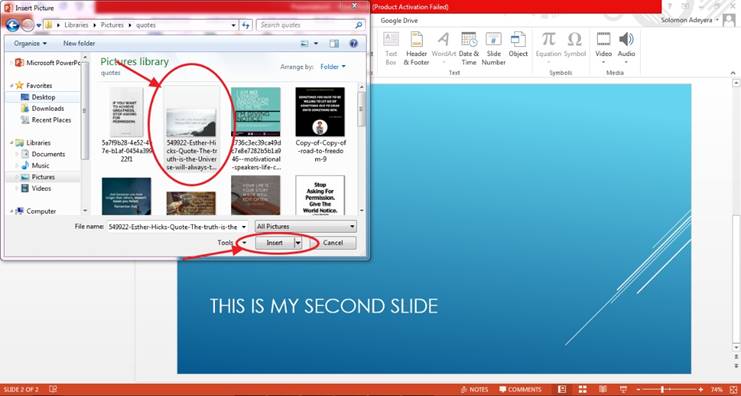
For the sake of simplicity, I’d focus on images for now. So, after you have opened up the “Insert” ribbon, click “Pictures”. It launches your computer’s file manager. Right there, you can browse images saved on your computer, or other devices connected to your pc. Click on the appropriate image to select it, and click“Insert.”

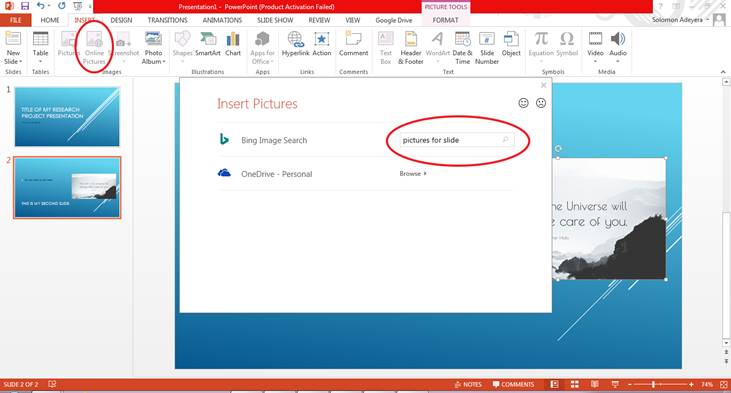
In case you can’t find an image that soothes your idea, don’t worry. Microsoft has got you covered. PowerPoint has a feature in the image group which lets you fetch pictures from the Internet. Select “Online Pictures” and Microsoft will open up a portal to the internet to search pool of images without leaving PowerPoint. That’s it. You can add as many as you can.
Feel free to edit your images with the black lines and tiny boxes that surround that image. To enlarge or decrease the size of the image, place your mouse pointer on the small box, click and hold, then drag the mouse to Size the image as you desire.
Step 7:
Add More Slides:
The same way, repeat this by adding more slides, texts, and images that drive home your point.
Since this guide only addresses making PowerPoint slides easily, do ensure that your contents fit into each chapter of your research as it should. Each chapter should be presented on different slides. Again to reinforce the warning, clumsy slides don’t get attention. You must keep it simple and just pick the major points in the research project (Do Not Copy the Entire Document into Power Point). In other words, keep it ventilated!
Step 8:
Save Your Presentation and Practice
This whole steps won’t be complete if you don’t save your works and practice before your real presentation day. As a matter of fact, the more you rehearse, the better your flow and the greater your performance.
Need I say more?
Well…, those are the easy steps to preparing PowerPoint slides for your research project. Be sure you try it out now before moving on. The rest of your presentation builds on those eight keys.
All the best!
You may also like: Making Awesome Presentations│ Developing Outstanding Research Topics │How to Write an abstarct │How to Write a Project Proposal │How To Choose the Right Measurement Instrument